
Removing a Fractured Implant Screw with the ZimVie Certain Screw Removal Kit
A step-by-step case from Deccan Dental
When an abutment screw breaks inside an implant, the fragment has to come out without harming the implant’s internal threads. For implants with the Certain internal-hex connection, ZimVie makes a kit for exactly this job: the Certain Screw Removal Tool Kit. This post walks through how we used it on a recent case, following the manufacturer’s recommended guidelines step by step. It’s written mainly for dentists, but patients who want to know what happens during a retrieval may find it useful too.
If you’re a patient with a loose implant crown, our guide to loose implant crowns is a better place to start.
The case
How it started
The patient had an implant and crown replacing their lower right second premolar (tooth #29), placed overseas a little over a year earlier. While chewing, they heard a distinct pop, and the crown immediately became loose. By the time we saw them, it was moving considerably when touched and the area was mildly tender. Their general dentist suspected a fractured screw and referred them to us, because retrieval needs instruments made for the specific implant system.
Talking it through first
Before starting, we went over the possibilities with the patient. If the screw had only loosened, we could take it out, check the components and secure the crown with a new screw. If it had fractured, the broken piece would have to be retrieved from inside the implant without damaging the implant’s threads or connection. We also explained the less likely outcome: if the fragment couldn’t be removed safely, the implant might not be restorable, and we discussed what the options would be in that case.
Getting to the screw
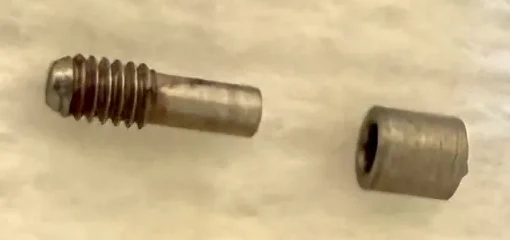
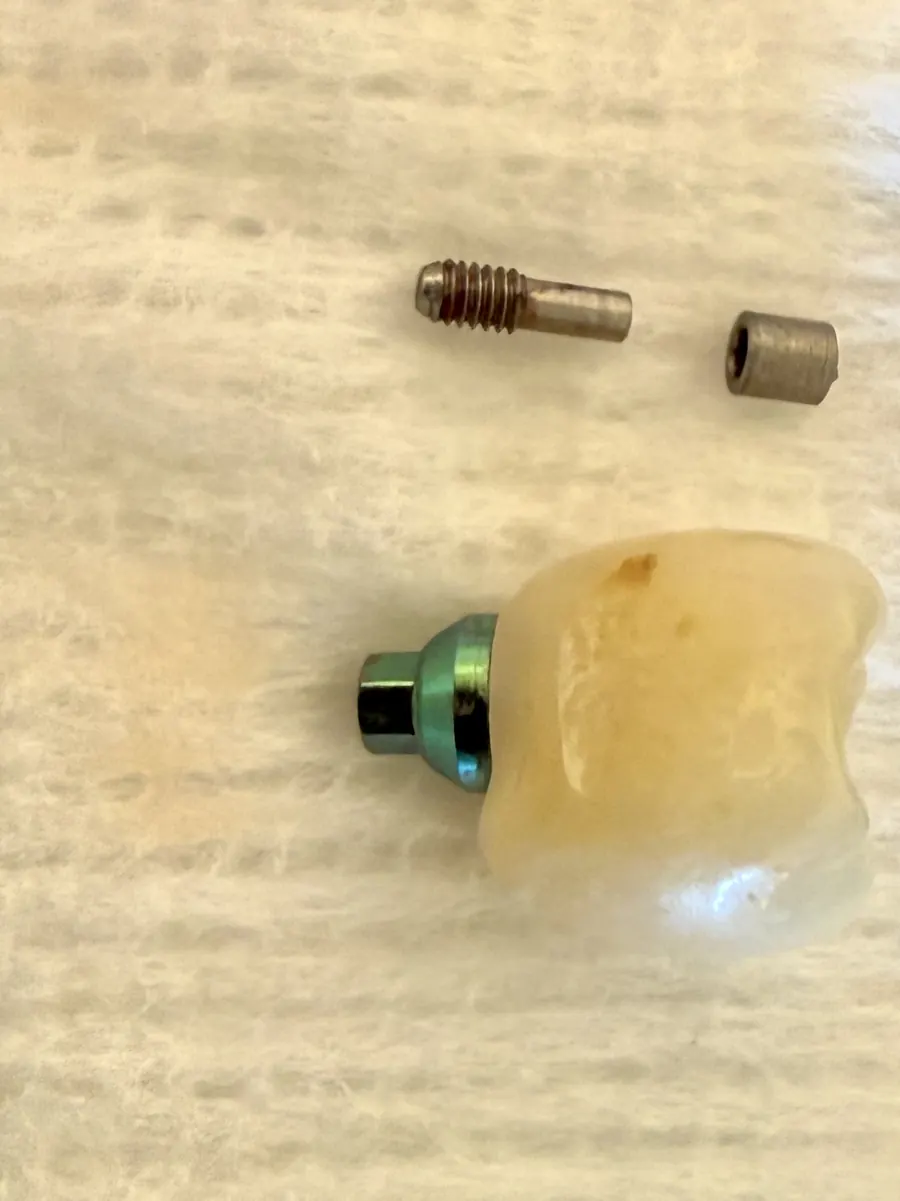
The crown was screw-retained, meaning the crown and abutment were joined as one unit and held to the implant only by the abutment screw, reached through a sealed access channel in the top of the crown. After local anesthetic, we opened that access channel to reach the screw and lifted the crown and abutment out together. With no cement involved, there was nothing to clean off and no risk of damaging the crown while removing it. That also confirmed the diagnosis. The abutment screw had fractured, and a substantial piece of it was still lodged in the implant, below the top of the implant where it couldn’t be grasped. That is the situation these kits are made for: the fragment sits too deep to reach with ordinary instruments, and the implant’s threads have to be protected while it comes out.
The result
The fragment came out in one piece, and together with the upper part of the screw removed earlier, the screw was recovered in two pieces. The implant itself was stable, and its internal threads and connection were undamaged, so the implant could be kept. The patient didn’t need it removed or replaced, and the old crown will be replaced with a new one on fresh components. The details of the retrieval follow.
First, identify the connection
Retrieval kits are specific to the implant connection, so this has to be settled before anything else. ZimVie (formerly Biomet 3i, and later part of Zimmer Biomet) makes two versions: one for its Certain internal-hex implants and one for its external-hex implants. The instruments look alike, but they aren’t interchangeable. Our ZimVie representative asked us to confirm which connection we had before ordering, and that’s good advice for anyone in the same position. This implant had a Certain internal-hex connection, so we ordered the Certain kit.
When an implant was placed at another office, the placing office’s records or the patient’s implant card are the most reliable way to identify it. X-rays and the components themselves can help when records are missing.
What’s in the Certain kit
The Certain Screw Removal Tool Kit (item ISRT10N) contains four hand instruments:
- A drill guide handle (ISRT05N), which seats on the implant and keeps the other instruments centered on the broken screw.
- A manual reversing drill (USRT07), turned by hand in reverse so its tip bites into the top of the fragment.
- A screw removal extraction tool (ISRT06N), which grips the fragment and unscrews it.
- A waxing screw, also called a guide pin (IWSU30), used at the end to check the implant’s internal threads.
According to ZimVie’s guidelines, the instruments come non-sterile and can be reused up to 15 times. They need cleaning and sterilization before every use and should be checked for wear each time.
How we removed the screw, step by step
We followed ZimVie’s directions for use exactly. In order:
- We removed the crown and abutment, along with the loose upper part of the broken screw, leaving the lower fragment in the implant.
- We seated the Certain drill guide handle (ISRT05N) fully on the implant platform, with its hex lined up with the implant’s internal hex. The guide keeps everything that follows centered on the fragment and away from the implant’s threads.
- With floss tied through the hole in its handle, we placed the manual reversing drill (USRT07) through the guide, seated its tip firmly on the broken screw, and turned it slowly counterclockwise, one to two revolutions, with moderate pressure.
- We took out the reversing drill, then the guide handle.
- With floss tied on again, we inserted the Certain screw removal extraction tool (ISRT06N), seated it on the top of the fragment and pressed down with moderate pressure so it engaged. One to two counterclockwise revolutions released the fragment from the implant’s threads.
- We withdrew the extraction tool with the fragment held in its tip and pulled the fragment free by hand. ZimVie’s guidelines say to repeat steps 2 to 5 if the tool doesn’t catch the screw.
- Finally, we threaded the Certain waxing screw (IWSU30) into the implant by hand. It turned in easily, which told us the internal threads were intact and the implant could be restored. A healing cap went on to protect it until the new crown was made.
Practical points
Patience with the reversing drill matters most. The drill is meant to bite into the fragment and coax it counterclockwise, so slow turns with steady, moderate pressure work better than force. Tying floss through each instrument takes a few seconds and removes the risk of a small part being swallowed or inhaled. And the waxing screw check deserves care, because it’s the step that tells you whether you’re restoring this implant or planning something else.
ZimVie’s guidelines are also clear that the kit won’t remove every broken screw, and the decision to use it rests with the dentist. Fragments that are wedged, damaged by earlier attempts or broken in an awkward place can still resist. If retrieval isn’t possible, the options include repairing the internal threads, making a custom post for the remaining connection, or leaving the implant buried and placing a new one. It helps to talk these through with the patient before starting.
After the retrieval
With the fragment out and the threads confirmed, the patient needs a new abutment screw and usually a new crown. Since most screw fractures start with a screw that had already loosened, the new restoration is a chance to look for the cause: the fit of the components, the bite on that tooth, and any signs of clenching or grinding. The new screw should be tightened to the manufacturer’s specified torque, and patients who grind may benefit from a night guard. The patient can have the final crown made with us or go back to their referring dentist for it.
Referring a patient with a broken implant screw
We have the ZimVie Certain Screw Removal Tool Kit in the office for ZimVie, Biomet 3i and Zimmer implants with the Certain internal-hex connection. If you have a patient with a fractured abutment screw and don’t have the kit for that system, you can refer them to Dr. Nanjapa. Please send the patient’s implant records if you have them. We’ll handle the retrieval and send the patient back to you for the final crown if you prefer.
This article describes a single case and is not a substitute for the manufacturer’s instructions for use. ZimVie, Certain and Biomet 3i are trademarks of their respective owners; Deccan Dental is not affiliated with ZimVie. Case details are shared without identifying information.
Have a patient with a broken implant screw?
Refer them to Deccan Dental, or call us to talk through the case.